
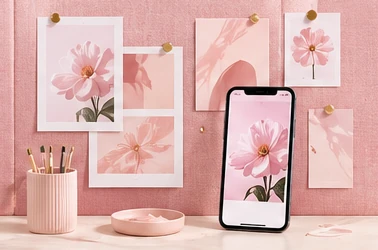
Want to create Pinterest pins that catch attention and bring more visitors to your blog? You do not need to be a graphic designer. Canva makes it easy to create attractive pins with clear text, great photos, and simple layouts.
In this guide, you will learn how to create eye-catching Pinterest pins in Canva, choose the right colors, write better headlines, and improve your designs for mobile users.
Watch This Canva Pinterest Pin Tutorial
Before you start, watch this step-by-step tutorial. It covers pin design, text, images, and useful Canva tools.
Ready to design? Explore Canva Pinterest pin templates to find a design you can edit for your own content.
1. Choose the Right Pinterest Pin Size
Start with a vertical layout that looks good on mobile screens. A common size is 1000 × 1500 pixels, which uses a 2:3 ratio.
- Open Canva and click Create a Design.
- Select Custom Size.
- Enter 1000 for the width and 1500 for the height.
- Click Create New Design.
Keep your main headline and image easy to see. Leave space around the edges so your pin looks clean and balanced.
2. Find a Template or Start From Scratch
Canva offers ready-made templates for food, beauty, home decor, travel, and many other topics. Pick one that fits your content, then change the text, colors, and photos.


Use a template as a starting point, not a finished design. Make changes that suit your topic and audience. You can also browse more Canva pin templates here.
3. Write a Headline That Grabs Attention
Your headline should tell people what they will learn or discover. Use simple words and focus on one clear idea.
- 7 Easy Breakfast Ideas
- Simple Skincare Tips for Glowing Skin
- Small Kitchen Storage Ideas
- How to Create Pinterest Pins
- Easy Meals for Busy Weeknights
Try to use four to seven words when possible. Make the headline large enough to read on a phone. You can also highlight one important word with a different color.
4. Choose Colors That Work Together
Good color choices make your design stand out. Pick two or three colors that suit your niche and keep the text easy to read.
| Niche | Colors | Style |
|---|---|---|
| Recipes | Cream, green, black | Fresh |
| Beauty | Pink, white, black | Modern |
| Home decor | Beige, white, olive | Warm |
| Blogging | Blue, yellow, black | Bright |
Use strong contrast between your text and background. For example, black text on a cream background is easy to read. Avoid using too many bright colors in one design.
5. Use Clear Fonts and High-Quality Images
Choose fonts that are easy to read at a small size. Use one bold font for the headline and one simple font for supporting text.
- League Spartan: Great for bold headlines.
- Montserrat: Clean and modern.
- Poppins: Friendly and simple.
- Open Sans: Easy to read.
Next, choose a clear photo that matches your topic. Use one main image instead of many small pictures. Avoid busy backgrounds that compete with your headline.
6. Keep Your Pin Layout Simple
A clean layout helps people understand your pin in seconds. Guide their eyes from the headline to the image and then to the call to action.


Follow this simple layout:
- Place the headline near the top.
- Add the main photo in the center.
- Put a short call-to-action button near the bottom.
- Leave enough empty space between each element.
Use Canva’s alignment tools to keep your design neat. Remove any element that does not help explain your idea.
7. Add a Clear Call to Action
A call to action tells people what to do next. Keep it short and match it to your content.
- See the Ideas
- Get the Recipe
- Explore the Guide
- View the Tips
- Learn More
Place the CTA inside a simple button. Choose a color that stands out from the background. Make sure the linked page delivers what the pin promises.
8. Use Pinterest SEO to Help People Find Your Pins
A good design can catch attention, but relevant keywords help Pinterest understand your content.
- Use your main keyword in the pin title.
- Write a natural, helpful description.
- Add related search phrases where they fit.
- Write descriptive alt text for the image.
- Link to a useful page that matches the pin.
For example, a breakfast pin might use phrases such as easy breakfast ideas, quick breakfast recipes, and simple morning meals. Add them naturally instead of repeating the same words.
9. Test Different Pin Designs
Do not assume your first design will perform best. Make a few versions and compare the results over time.
| Pin | What to change | What to check |
|---|---|---|
| A | Original design | Baseline results |
| B | New headline | Outbound clicks |
| C | Different image | Saves and clicks |
Use Pinterest Analytics to review impressions, saves, and outbound clicks. If your goal is blog traffic, focus on outbound clicks and test one major change at a time.
Final Pinterest Pin Checklist
- The headline is short and clear.
- The image matches the topic.
- The colors work well together.
- The text is easy to read on mobile.
- The CTA is visible.
- The title and description use relevant keywords.
- The destination link works.
Conclusion
Creating eye-catching Pinterest pins in Canva is easy when you follow a simple process. Start with a clear headline, choose an attractive image, use readable fonts, and keep your layout clean.
Remember that design is only one part of Pinterest growth. Useful content, relevant keywords, and regular testing also matter.
Ready to create your first pin? Choose a Canva Pinterest template, customize it for your topic, and test a few designs to see what your audience likes best.