
Design Your Card
Choose your card, personalize both sides, then review your design and add it to your cart.
Loading your private design workspace…
Create a custom card layout before you place an order. Choose a card style, personalize the front and back, add your own visual details, review the preview, and add the finished design to your cart when everything looks right. Keep the layout simple, use clear artwork, and check every detail at normal card size before ordering.
Important: this page is for visual card design and product customization. It is not a bank, credit-card application, or payment-credential generator. Use masked or sample details in mockups, and never enter real card numbers, CVV/CVC codes, PINs, passwords, banking logins, or other confidential financial information into a public-facing design.
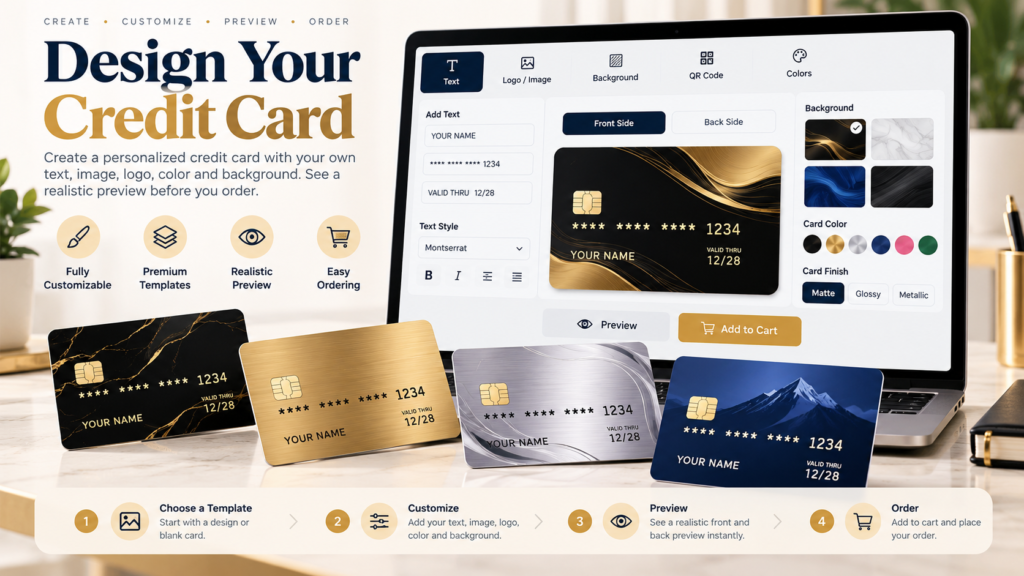
How to Use the Design Your Credit Card Tool
1. Choose a card style
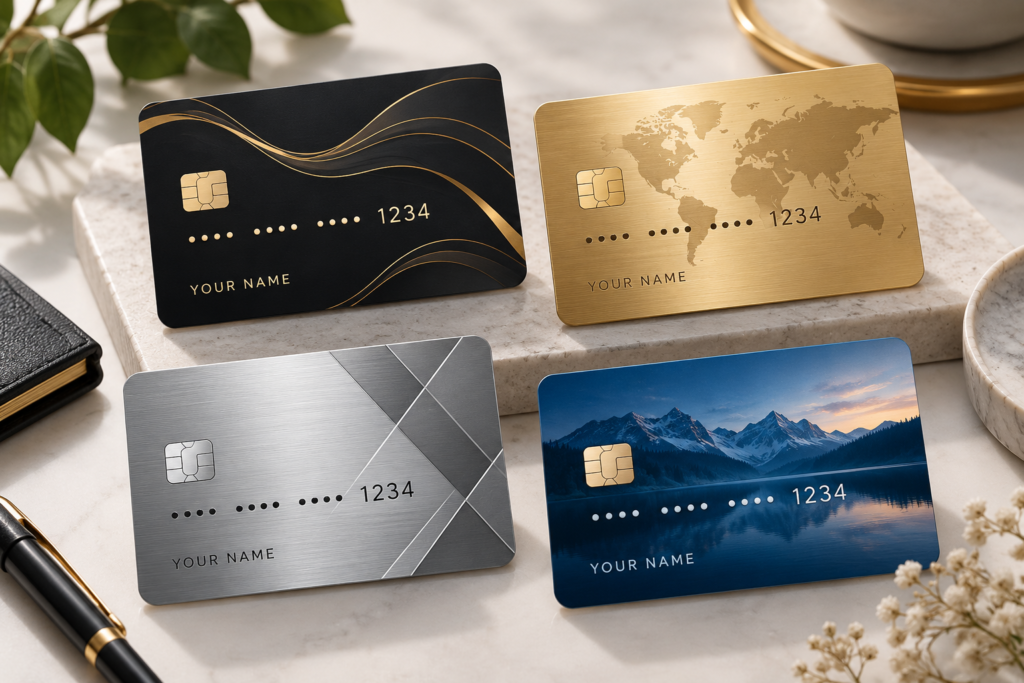
Start with the base card style or finish that matches the look you want. A dark geometric design can feel bold and modern, while gold, silver, blue, minimal, or photo-based finishes create a different mood. Make this decision first so you are not choosing the finish, artwork, text, and layout all at once. The exact choices can vary by the card product you select.
2. Personalize the front
Use the front as the main visual side. Add the name, logo, artwork, background, colors, or other elements supported by your selected card. A strong front usually needs fewer elements than you expect. Give one element the most attention, then support it with clean spacing. If an uploaded image has distracting edges, crop the unwanted edges before placing it in the design.
3. Personalize the back
Let the back support the front instead of simply repeating it. Depending on the options available for the selected product, use the back for secondary text, contact details, a QR code, a background treatment, or a quieter continuation of the front design. For practical layout ideas, see the Front and Back Card Design Layout Ideas guide before you finalize both sides.
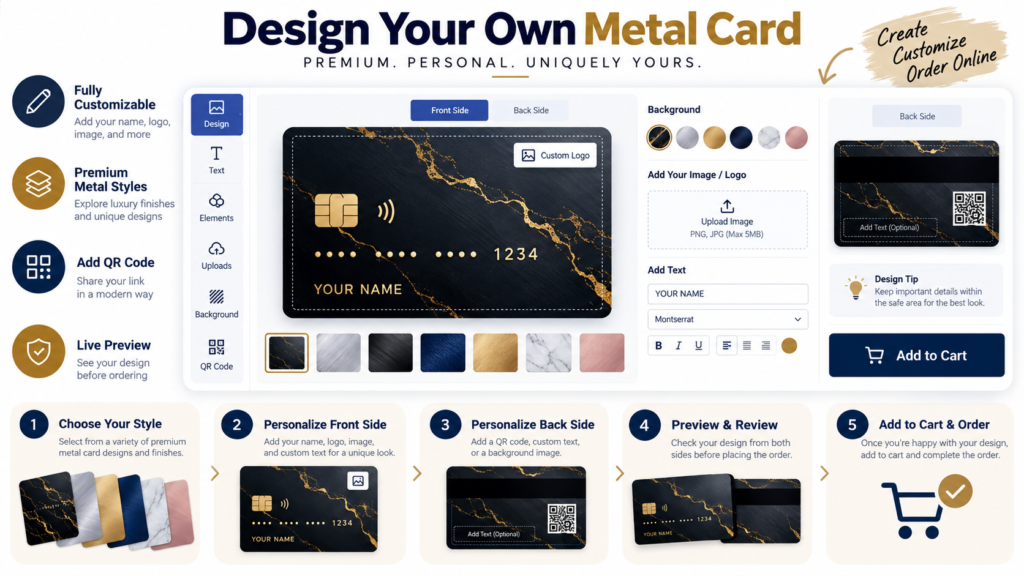
4. Preview and review your design
Look at the front and back together. Check alignment, spacing, spelling, image quality, and the position of important elements. Zoom out as well as in. A layout that looks balanced at normal card size usually works better than one that only looks impressive when enlarged on a desktop screen. If text blends into the background, compare the colors with the Color Contrast Checker.
5. Add your custom card to cart
When the design looks right, perform one final review before adding it to your cart. Confirm the selected card style, front and back artwork, names, text, image placement, and any optional elements. Controls can differ between card products, so use the labels in the live designer as the final source for the configuration you are ordering.
What You Can Customize
A useful card designer gives you control over the visual choices that matter without forcing you to build every layout from scratch. Start with the base design, then change only the elements that make the card clearer or more personal.
- Card style or finish: choose the starting look that fits your purpose.
- Front-side layout: use the main side for your strongest visual identity.
- Back-side layout: place supporting information or continue the theme more quietly.
- Text and names: keep wording short enough to stay readable at card size.
- Logo or artwork: use a clean, high-resolution file with enough breathing room around the subject.
- Background and colors: create clear contrast between the surface and the most important elements.
- QR code or decorative elements: use them only when your selected card supports them and they serve a clear purpose.
- Preview: judge the complete composition before ordering instead of reviewing every element in isolation.
Design Tips for a Cleaner, More Professional Card
Give the front and back different jobs
The front works well as the visual introduction, while the back can handle secondary information or utility. Repeating every element on both sides can waste space and make the card feel crowded. A clear front-and-back layout plan helps you split those roles more intentionally.
Keep important details away from the edges
Small cards need breathing room. Avoid pushing names, logos, QR codes, or important artwork too close to the edge. Comfortable spacing makes a design easier to scan and reduces visual crowding. If you want a more systematic approach to spacing, hierarchy, and alignment, use the Canva Layout and Alignment Tips guide.
Use one strong visual direction
A card becomes harder to read when every area competes for attention. Pick one hero element such as a monogram, logo, abstract pattern, photograph, landscape, or strong color treatment. Then simplify the rest. Fewer, stronger elements often make the overall composition feel more deliberate.
Upload sharp artwork
A blurry logo will not become sharp simply because it is placed on a premium card. Start with the cleanest source file available, crop unwanted space, resize carefully, and avoid repeatedly saving low-quality copies. If you are exporting artwork from Canva before upload, review how to export Canva designs so you can prepare a cleaner source file.
Check text contrast
Gold on cream, gray on silver, or pale text over a bright photograph can disappear at card size. Use enough contrast so names and important labels remain readable. Compare solid foreground and background colors before you commit to the final palette, then inspect the full composition at card size.
Keep QR codes clear
If the selected card supports a QR code, give it a simple area with enough empty space around it. Avoid placing the code over a busy photograph, texture, or decorative pattern. When a scannable preview or proof is available, test the code before ordering.
Proofread every line
Design problems are usually easy to notice; small typing mistakes are easier to miss. Read every name and line slowly, then check the front and back one final time. If you are shortening a slogan or message, the Word & Character Counter can help you keep the wording concise.
Prepare Your Logo or Image Before Uploading
A few minutes of image preparation can make the design process easier and help the artwork look cleaner at card size.
- Crop distractions.
Remove unnecessary empty space or unwanted edges with the
Image Cropper. - Resize for the composition.
Use the
Social Media Size & Image Resizer
when you need a more suitable shape or want to preserve the main focal point. - Convert the format if needed.
The
PNG, JPG & WebP Converter
can create a more convenient raster format for your next step. - Compress oversized files.
The
Image Compressor
can reduce unnecessary file weight while letting you inspect the visual result. - Keep the original.
Save an untouched master copy before creating smaller or web-ready versions.
The goal is not to make every file tiny. The goal is to give the designer a clean, readable image that still looks good when viewed at the final card scale.
Custom Card Design Ideas
| Style | Works well for | Keep in mind |
|---|---|---|
| Minimal black or monochrome | Founders, consultants, and simple personal designs | Use strong spacing and very little decoration. |
| Gold or luxury style | Premium personal brands, gifts, and statement designs | Choose one metallic focal point instead of covering every area with gold. |
| Business or personal-brand style | Networking, agencies, creators, and consultants | Prioritize the name, logo, and a clear information hierarchy. |
| Travel or landscape artwork | Keepsakes and highly visual designs | Use a high-resolution image and keep important text away from detailed areas. |
| Monogram or gift style | Events, keepsakes, and special occasions | A short name or initials can feel stronger than a full information block. |
If you want a beginner-friendly planning process before customizing your card, follow the How to Design a Custom Metal Card Online guide.
Privacy and Safe Design Practices
Treat every visual mockup as public-facing artwork. Use masked or sample information when planning the appearance of a payment-style card. Never type a real card number, CVV/CVC code, PIN, online-banking password, bank account number, one-time security code, or other confidential financial information into a public design or image.
Only upload logos, photos, and artwork that you own or have permission to use. Avoid copying protected brand marks, copyrighted illustrations, or someone else’s personal information without authorization. For a business design, use your own brand assets or properly licensed material.
Why Use a Browser-Based Card Designer?
A visual designer helps you test a concept before you commit to an order. You can compare styles, see how the front and back work together, and make spacing or color changes while the full composition is still visible. This is especially useful when a design combines several asset types such as a logo, short text, a background, and an optional QR code.
The review stage also becomes more concrete. Instead of imagining how separate files will look together, you can judge the complete composition and correct obvious issues before adding the customized card to cart.
Continue Your Design Workflow
If an uploaded asset needs work, browse the Free Design Tools collection. You can crop, resize, compress, convert, check contrast, and refine short text before returning to the card designer. For wider design inspiration, you can also explore the CanvaFreeTemplate.com template library.
For deeper guidance, continue with the custom metal card tutorial, the front-and-back layout guide, and the alignment guide linked above. These resources focus on practical design decisions such as hierarchy, spacing, image quality, and final review rather than simply adding more decoration.
Frequently Asked Questions
Can I design both sides of my card?
The current workflow is built around personalizing both sides before review. Give the front and back different roles so the final design stays clear. Exact controls can vary by the card style or product you select, so use the live interface as the final source for available options.
Can I upload my own logo or image?
Use the upload option when it is available for your selected card. Start with a clear image that you own or have permission to use. Crop unnecessary edges and keep the main subject large enough to remain visible at physical card size.
What image format should I prepare?
PNG or JPG is usually a practical starting point for web-based design tools. If your source image is in another raster format, convert a working copy before upload. Always follow the actual file requirements shown by the live designer.
How do I keep text readable on a dark or patterned background?
Use strong contrast and keep wording away from the busiest areas of the artwork. Dark backgrounds usually need lighter text, while light backgrounds usually need darker wording. Check solid color pairs with a contrast tool, then inspect the complete card visually at a realistic scale.
Can I add a QR code?
If the selected card supports a QR code, place it in a simple area with enough empty space around it. Avoid detailed artwork behind the code. Test it before ordering whenever a scannable proof or preview is available.
Should I use my real card number in the design?
No. Use masked or sample placeholders for visual planning. Never place real payment-card numbers, CVV/CVC codes, PINs, banking passwords, one-time codes, or other confidential financial information into a public mockup or design file.
What should I check before adding the card to cart?
Review both sides, spelling, text alignment, artwork quality, safe spacing, contrast, and any optional QR code. Confirm that the selected card style and customization options match what you intended, then perform one final visual check at normal card scale.
Is this an official bank credit-card application?
No. This is a card-design and product-customization experience. It does not issue a bank account or credit line, approve credit, or create valid payment credentials.
How can I improve a blurry image before uploading?
Start with the highest-quality original available. Cropping can improve composition, but enlarging a small image cannot recreate missing detail. Avoid repeated compression, and keep an untouched source file in case you need to prepare a cleaner version.
Ready to Create Your Card Layout?
Scroll back to the designer above, choose a style, personalize both sides, review the preview carefully, and add the finished card to your cart when everything looks right.
